
It's getting a little too cold for me here in Tennessee and it's only October! Fall is my most favorite season of all! Though it is odd that i really hate the season that follows: Winter. And for so many reasons too! Most of them do have something to do with me being miserably cold though.
I'm sure whoever it was that made up the holidays... must have felt the same way about it and decided that all the best and fun holidays should be in the most miserable time of the year. Yes that's it! That way life is fair! haha!
I have mentioned in my previous entry that i have been doing a lot of candle burning lately. Especially now that it has gotten colder. The flame, though little, keeps me warm and cozy. :) Sadly some of my favorite candles have let me down by burning out way before their time, way before the wax got a chance to serve it's purpose!
 Gosh, i would just hate to have to toss them when the best part about the candle is only half way used but the wick is completely burned to a knob. So one day, actually way back in the day, in my high-school years, i figured out a way to revive a burned out candle and ever since then I have saved many a candle with a simple and easy method that i will show you down below.
It's weird, but i find great pleasure in saving/reviving/restoring or recycling things. Have been doing that ev'r since i got my first tooth! (well kinda)
Though, don't get me wrong, i'm like any other girl, i LOVE shopping for new things too, but nothing beats the joy of saving something that someone else would have given up on. :)
Here's How:
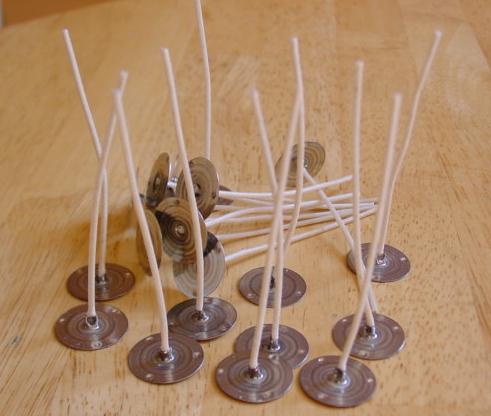
 First thing you will do is figure out if the wax of your burned out candle can be pulled out of it's original jar. You will want to break the wax into smaller pieces, pull out the remaining wick or the metallic wick holder and place the pieces of wax in a microwavable bowl.
NOTE: You do not want to microwave in the original jar because you don't know if it is microwave-safe and plus the metallic wick holder will spark in there.
The best way is to pull out the wax, crumble and use the microwave.
A few of my candles were impossible to pull out of their jars so i had to melt them on the stove. I do not recommend this process because one of my candle jars did end up cracking on the bottom because of the heat (even though it was on the lowest setting on the stove). :(

NOTE: you will actually use the "Defrost" button on your microwave instead of just heating it on the normal setting. The Defrost button will heat the candle slowly instead of shocking it and having it bubble and splatter inside.
So Defrost! :)
I had mine set for 15 minutes and that did it!
While that was melting away in the microwave i prepared my new wick. The best and easiest way is to cut a long strip of a cotton piece of fabric for the wick.
Note: The thicker the fabric the better.
If your fabric is really thin, you can braid it.

I had this pretty piece of cloth that I used cause I like to burn fancy things!! No, Actually, i have a closet full of all kinds of crafty goodies and so I used what i was able to find in there. If you don't have a magical closet, full of crafty goodies, you can use an old pair of jeans! Just cut yourself a strip and you're good to go!

Make your strip about 1/3 of an inch wide or a little wider. For the length, you will measure your original candle jar and double the height of it. That will be your length.
Next tie a knot at one end.
See if you can tie it at least 3 times on top of the same knot. The heavier your knot is the better. Hopefully by the time you are done measuring, cutting and tying, your wax will be totally melted and ready to pour back into your original jar.
NOTE: Use oven mitts to handle your bowl of wax. It will be hot!! Also you might want to cover your table or your work area with a paper bag or newspaper.
Carefully transfer the melted wax into the original jar and quickly wipe the bowl with a paper towel cause you don't want hardened wax on the walls of the bowl you were not planning to throw away yet.

Then, get your new wick and grab a pencil or a pen and place it by you.
Next, dip your wick (knot first) all the way into the wax leaving only the tip you are holding it by.
Let the wick soak up the wax for a little bit.
 Pick up your pencil/pen or in my case a bamboo stick left over from "cookie on a stick" and wrap the wick around it like a spiral. Keep wrapping till the knot on the end of the wick is touching the bottom of the jar while the rest of the wick is hanging straight down from the stick.
Adjust and move your stick to have the knot in the very center and bottom of the jar. You can see my knot resting on the bottom of the jar. :)
(click on any picture to enlarge)

 Now you will transfer your candle into the fridge. Be very careful not to move or touch the stick. You don't want to move the wick out of the center of the jar.
Leave the medium size candle it in the refrigerator for an hour or so. If you have a large candle you might want to leave it in for 2 hours or so. It's safer to give it more time to harden versus less.
I had a little incident the other day with one where it collapsed into itself and the wick fell all the way to the bottom of the jar and hardened that way. I had to melt the whole thing and start from scratch again. Have to say...not as fun the second time around for some reason. So yes, the longer the better.

After refrigerating, pull your stick out of the coiled wick. Now you will trim it to be about 1/3 of an inch or even shorter. This will adjust the size of your flame. I like to have a smaller flame, that way the candle last a little longer, so my wick is about 1/4 of an inch.
Well that's it! You're done!
Now light it and be proud of yourself!! :D

Let me know if this was a helpful tutorial and if it worked out for you!
I'd love to hear from you guys!
This is so clever, Inna! I'll have to try it :)
ReplyDelete-Alla
Thanks love!!
ReplyDeleteLet me know how it goes! :)
Do you ever freeze your candles to get the wax out? That's what we do!
ReplyDeleteI wish I had the patience to do this. Maybe if we did it together. :)
ReplyDeleteI like your style, great idea and wonderful job!
ReplyDeleteTake a look at my blog, and if you like it follow me, I’ll be waiting for you!
Cosa mi metto???
amazing! ill be trying this for sure :D
ReplyDelete